Maker Space
Using Maker Education to cover curriculum in fun and engaging ways!
2019 was a big year for me taking on new things in my classroom. From MakerSpace, to 3D printing, to Little Green Thumbs Garden, everything worked perfectly in sync to create a “Maker Culture” in my classroom. Students were leading the charge with inquiry based learning and skill development.
I was even featured in Brilliant Labs Magazine (Spring 2019 Edition - page 10) for my thoughts on Maker Education.
A big shout out to Brilliant Labs for supporting the Maker movement with grants for my classroom and school. Check out the BL website for funding opportunities and PL. I also want to say a big thank you to supportive administration, parents and the school community for helping support me in my endeavours this year. Everyone working together, make these kinds of initiatives possible.
I am thankful to my buddy Melissa Lee for much help and guidance. She is a former Grade 5 teacher with lots of experience implementing Maker Education. She now works as Coding Itinerant with NLESD and Brilliant Labs. She was able to make some classroom visits, give me insight on “do’s and don’t” and sent me in the right direction on how to implement. She spoke about her experiences at a Makers Gonna Make PL session at the fall NLTA TESSIC STEMFest at MUN. I got ideas from that session on what a Maker Space is and isn’t.
Some tips for starting up a Maker Space:
You don’t need a lot
Some teachers have commented that they don’t have a lot of resources. While technology and fancy things are great to have, the most used resources in my Maker Space are up-cycled materials found around the school and from what students have brought in. Cardboard, glue, tape, yarn and material scraps are the most popular items. Maker does not have to be digital.
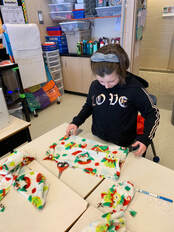
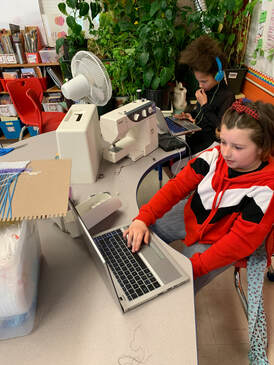
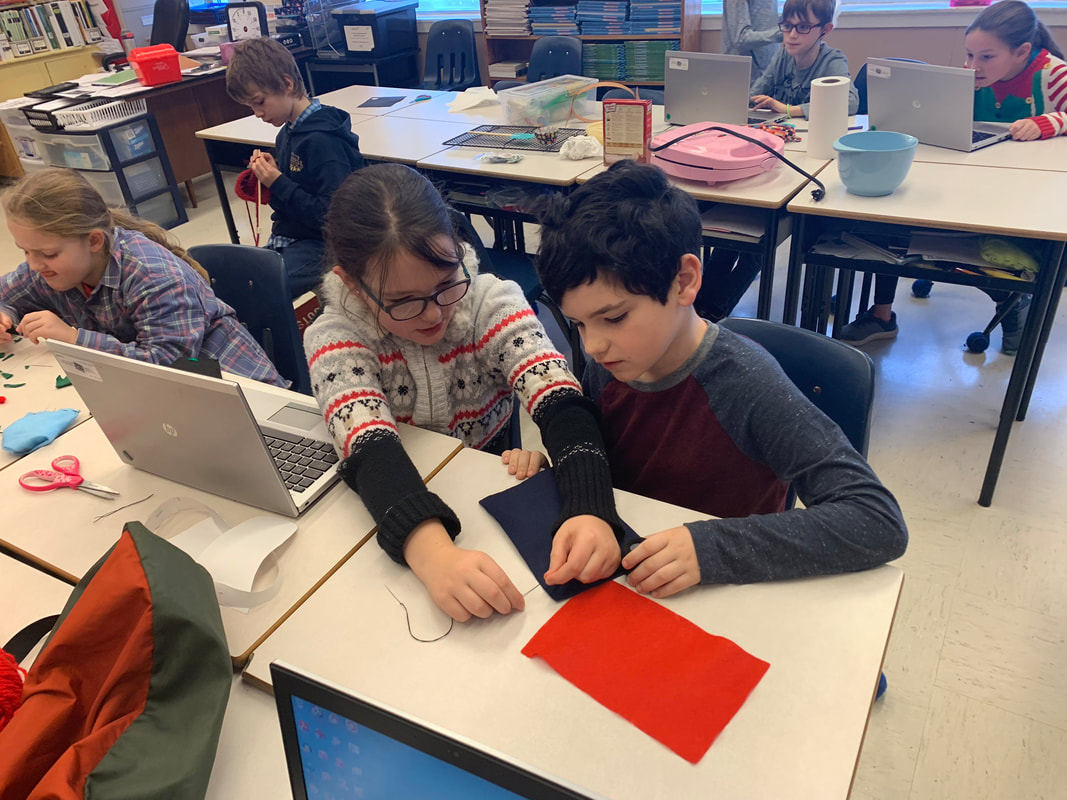
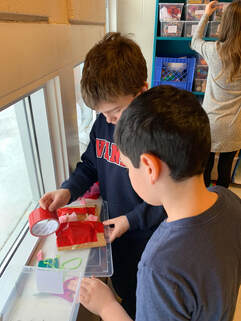
Sewing fun!
|
Weaving
|
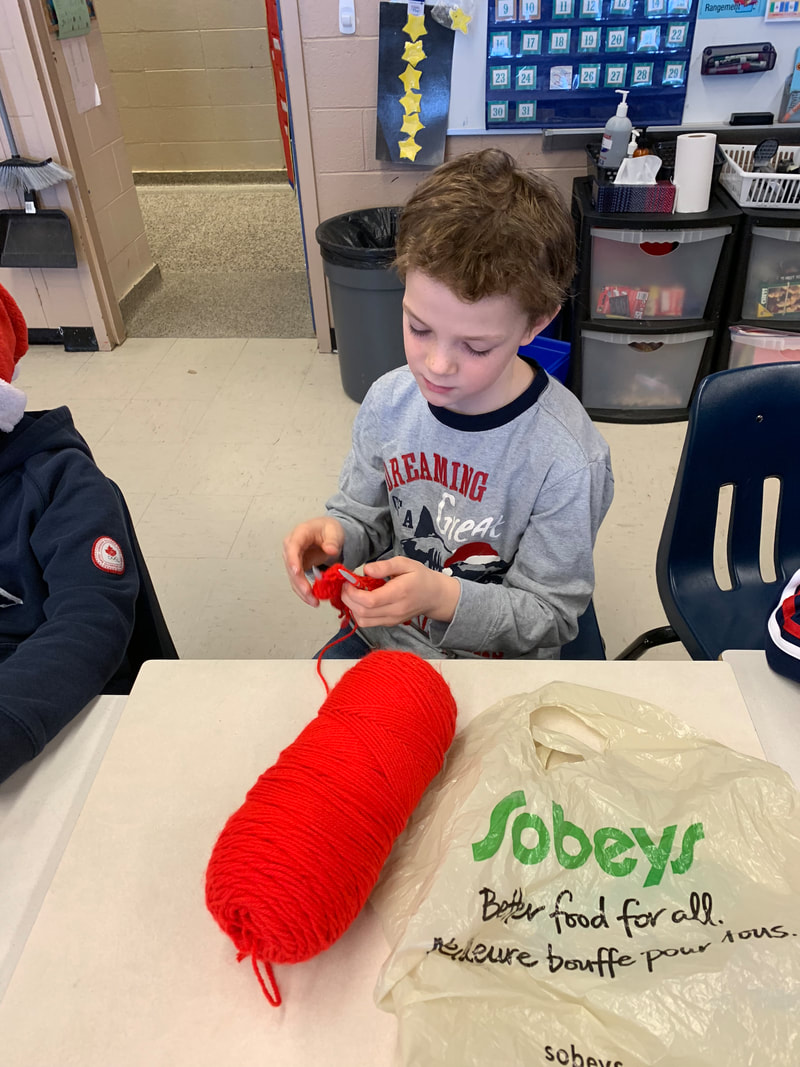
Knitting
|
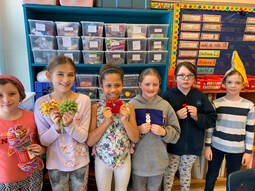
Cool textile projects!
|
Ideas are everywhere!
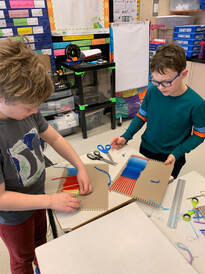
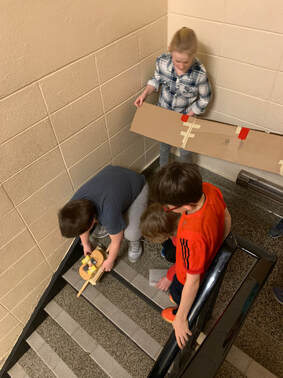
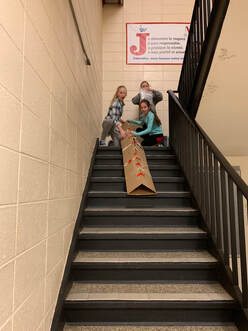
You CAN use maker challenges to cover your curriculum. I’ve found all kinds of creative ways. The new NL science curriculum has so many inquiry based activities in there. Let your curriculum serve as your inspiration! Students also came up with some pretty creative ideas when just freely experimenting with the material. I loved seeing the imagination and creativity shine through. Some times we did more structured activities that I found online or on Pinterest. One great activity we did was after Christmas. The challenge was to build some type of device in which a Candy Cane could make it down our school stairs without breaking. Here is some of the experimenting we did:
You CAN use maker challenges to cover your curriculum. I’ve found all kinds of creative ways. The new NL science curriculum has so many inquiry based activities in there. Let your curriculum serve as your inspiration! Students also came up with some pretty creative ideas when just freely experimenting with the material. I loved seeing the imagination and creativity shine through. Some times we did more structured activities that I found online or on Pinterest. One great activity we did was after Christmas. The challenge was to build some type of device in which a Candy Cane could make it down our school stairs without breaking. Here is some of the experimenting we did:
|
|
|
Creativity needs to be fostered
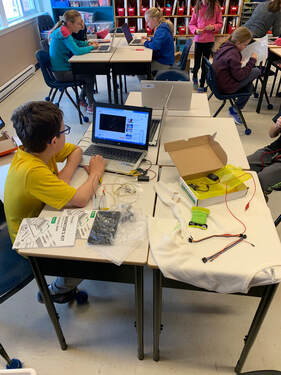
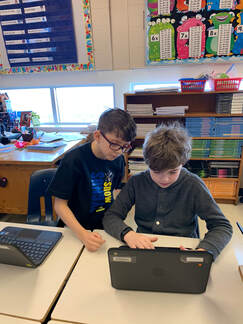
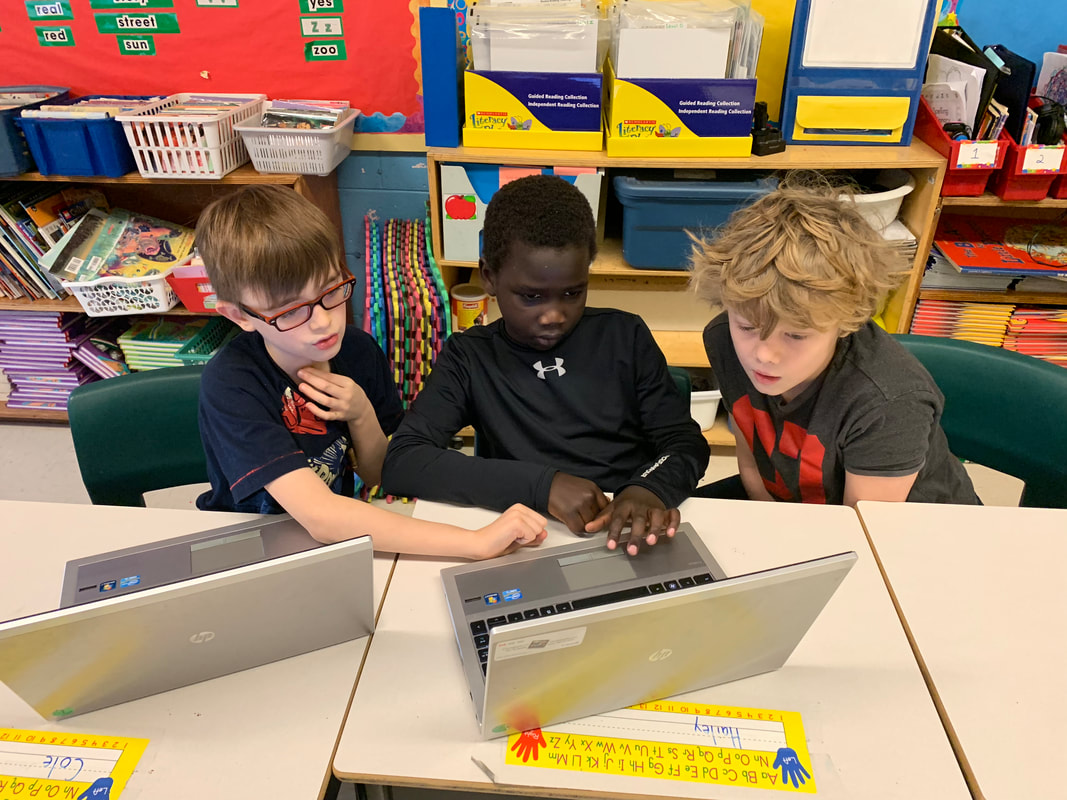
Some students struggle with the “get started” when it comes to making, this is where they need a little guidance and skill building. I spend the first part of the year mainly building skills, that they then can apply to more open-ended projects. Giving something very open ended in the beginning can be tough for some students to grasp and they get frustrated. I suggest doing some whole class projects using coding (Scratch), podcasting (Audacity), iMovie, Green Screen, Google Docs, Stop Motion studio...etc. I am by no means an expert. YouTube and students keen on learning something have been my guides. You can learn a lot from Googling, or simply asking your own students for help.
Some students struggle with the “get started” when it comes to making, this is where they need a little guidance and skill building. I spend the first part of the year mainly building skills, that they then can apply to more open-ended projects. Giving something very open ended in the beginning can be tough for some students to grasp and they get frustrated. I suggest doing some whole class projects using coding (Scratch), podcasting (Audacity), iMovie, Green Screen, Google Docs, Stop Motion studio...etc. I am by no means an expert. YouTube and students keen on learning something have been my guides. You can learn a lot from Googling, or simply asking your own students for help.
Student self-teaching Microbit using YouTube.
|
Student mentoring teachers and principal about coding.
|
Threading the sewing machine thanks to online tutorials.
|
Working together is key
The most amazing part about a Maker Culture is that the teacher is not the centre of learning, rather learning ownership goes to the student. Some students began to learn skills based on interest such as coding, knitting, sewing….etc. They then became “the expert” and began teaching others. Little learning communities just happened naturally. One student watched YouTube to learn how to use my sewing machine, and then taught 2 others, who taught others. Group work was not forced upon them, but rather something they chose to do. When giving projects, I tend to let them choose if they want to work independently or with someone else. You would think that they would only pick their close friends, but they didn’t. Students ended up working with different partners often, based on what kind of projects they were doing, never did I feel the same students were always together, rather I felt that I had a class in which anyone could collaborate with everyone.
The most amazing part about a Maker Culture is that the teacher is not the centre of learning, rather learning ownership goes to the student. Some students began to learn skills based on interest such as coding, knitting, sewing….etc. They then became “the expert” and began teaching others. Little learning communities just happened naturally. One student watched YouTube to learn how to use my sewing machine, and then taught 2 others, who taught others. Group work was not forced upon them, but rather something they chose to do. When giving projects, I tend to let them choose if they want to work independently or with someone else. You would think that they would only pick their close friends, but they didn’t. Students ended up working with different partners often, based on what kind of projects they were doing, never did I feel the same students were always together, rather I felt that I had a class in which anyone could collaborate with everyone.
|
|
|
|
Build skills first, then move to more open-ended
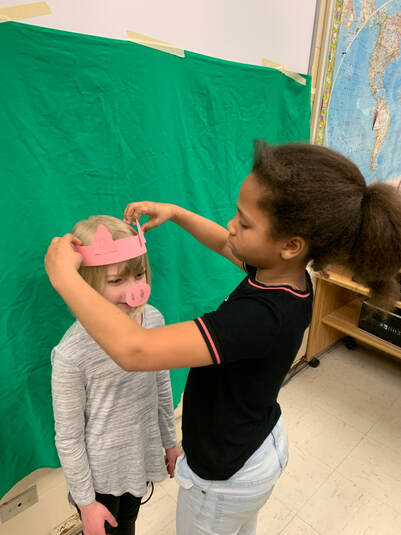
When my students came to me at the beginning of Grade 4 they could barely even log onto the computers. With some patients and guided activities, they became fully tech-literate students who could create digital projects independently, search for answers they didn’t know, and share projects via Google Classroom. Once they had the skills, we became “technology mentors” to the rest of the school. Teachers who were once afraid to try new things, were loving the help of my mini army of experts. Often teachers would borrow students to do Green Screen Projects, Code, record audio or 3D print. We did this with every grade level, from K-6. They began feeling empowered by all their newly acquired skills and loved a chance to demonstrate leadership. Proud Teacher Moment! We reached beyond our school community to mentor other students and teachers, at a Maker Fair, on YouTube and a professional learning session for teacher by students facilitated by NLESD and Brilliant Labs.
When my students came to me at the beginning of Grade 4 they could barely even log onto the computers. With some patients and guided activities, they became fully tech-literate students who could create digital projects independently, search for answers they didn’t know, and share projects via Google Classroom. Once they had the skills, we became “technology mentors” to the rest of the school. Teachers who were once afraid to try new things, were loving the help of my mini army of experts. Often teachers would borrow students to do Green Screen Projects, Code, record audio or 3D print. We did this with every grade level, from K-6. They began feeling empowered by all their newly acquired skills and loved a chance to demonstrate leadership. Proud Teacher Moment! We reached beyond our school community to mentor other students and teachers, at a Maker Fair, on YouTube and a professional learning session for teacher by students facilitated by NLESD and Brilliant Labs.
Mentoring other classes.
|
|
Student led PL session - June 2019 at DCC.
|
Clear bins let students see what is in them
We bought clear shoe bins for $ 3 from Home Depot for smaller materials, and larger bins from WalMart for larger items. I did a lot of small bins, but if I had my time back I think larger bins that are just based on type of material would be best. For example a large bin for plastic, wood, craft supplies, etc. Do what works best for you at your school and your space, but consider how much effort it will take to keep organized.
We bought clear shoe bins for $ 3 from Home Depot for smaller materials, and larger bins from WalMart for larger items. I did a lot of small bins, but if I had my time back I think larger bins that are just based on type of material would be best. For example a large bin for plastic, wood, craft supplies, etc. Do what works best for you at your school and your space, but consider how much effort it will take to keep organized.
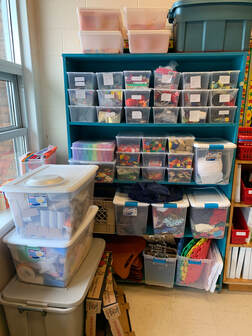
Our classroom "Maker Space"
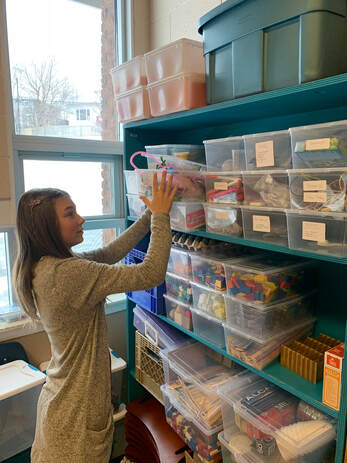
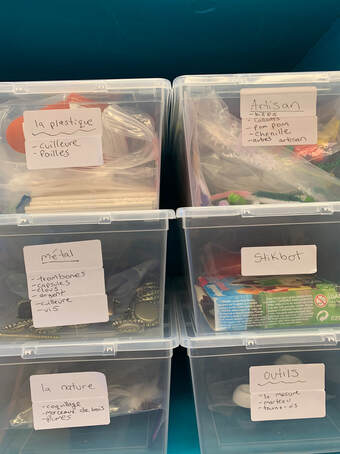
Label
Knowing where to put things back is really important for students. As your spaces grows and changes, you may need to revisit the organization. I had small bins for cardboard, but quickly graduated to much larger RubberMaid containers as we evolved through the process.
Knowing where to put things back is really important for students. As your spaces grows and changes, you may need to revisit the organization. I had small bins for cardboard, but quickly graduated to much larger RubberMaid containers as we evolved through the process.
|
|
Tape is great, but...
You may want to put limits on tape and glue use, or students tend to use a lot and be wasteful. My students were obsessed with glueing things together. I cannot tell you how many hot glue gun sticks we went through... I asked them if there were more sturdy and efficient ways to connect cardboard together. 3D printed cardboard connectors or 3D printed screws (or MakeDo Scru) were a great way to connect the pieces together.
You may want to put limits on tape and glue use, or students tend to use a lot and be wasteful. My students were obsessed with glueing things together. I cannot tell you how many hot glue gun sticks we went through... I asked them if there were more sturdy and efficient ways to connect cardboard together. 3D printed cardboard connectors or 3D printed screws (or MakeDo Scru) were a great way to connect the pieces together.
3D printed cardboard connector pieces.
|
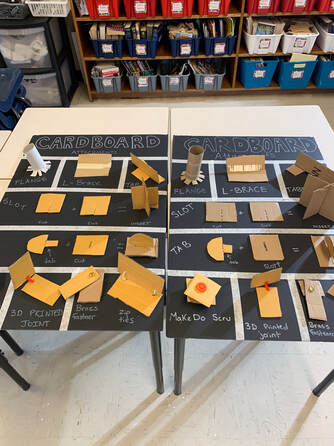
Cardboard connector anchor charts.
|
Ask parents/guardians/community for help
Asking the school community for help is a great way to keep your Maker Space stocked. Our lovely secretary would keep interesting packing material for us. I asked parents for material scraps, small wood pieces, interesting materials...etc. and they would send it in no problem. Even old t-shirts were a hit! Having the community help with projects (example: inviting an engineer in to do a challenge), getting parents involved in the space, or assigning responsible students to be the Maker Space Guardians are all great ways to keep the space maintained.
Asking the school community for help is a great way to keep your Maker Space stocked. Our lovely secretary would keep interesting packing material for us. I asked parents for material scraps, small wood pieces, interesting materials...etc. and they would send it in no problem. Even old t-shirts were a hit! Having the community help with projects (example: inviting an engineer in to do a challenge), getting parents involved in the space, or assigning responsible students to be the Maker Space Guardians are all great ways to keep the space maintained.
Keeping it clean can be a struggle
Sometimes students get so involved with the making, that the space can become messy. Having clearly established norms, rules, and routines will help keep your Maker Space clean and organized. Consider posting them as clearly defined rules or even picture references for how things should be kept and stored. Be prepared to have some “re-organizing time” every couple weeks. Have students in charge of the space, but also have a class culture that making does involve editing and tidying. I had to be firm when I saw things not being cared, especially for open maker space time during inside lunch days. I had to threaten they would not continue. Students began to take on more ownership when they knew that it was something they all needed to care for to be operational. This goes for fellow teachers if using a shared school Maker Space. Sign out sheets are a great way to keep accountability (I’m thinking about all those wires from Makey Makey’s). Also make sure that you build a good amount of tidying time into the end of your Maker time to prevent students from frantically shoving things in random bins. You may need to go back from time to time and clean out materials that have been used up and only small bits remain, or to see what needs to be restocked.
Sometimes students get so involved with the making, that the space can become messy. Having clearly established norms, rules, and routines will help keep your Maker Space clean and organized. Consider posting them as clearly defined rules or even picture references for how things should be kept and stored. Be prepared to have some “re-organizing time” every couple weeks. Have students in charge of the space, but also have a class culture that making does involve editing and tidying. I had to be firm when I saw things not being cared, especially for open maker space time during inside lunch days. I had to threaten they would not continue. Students began to take on more ownership when they knew that it was something they all needed to care for to be operational. This goes for fellow teachers if using a shared school Maker Space. Sign out sheets are a great way to keep accountability (I’m thinking about all those wires from Makey Makey’s). Also make sure that you build a good amount of tidying time into the end of your Maker time to prevent students from frantically shoving things in random bins. You may need to go back from time to time and clean out materials that have been used up and only small bits remain, or to see what needs to be restocked.
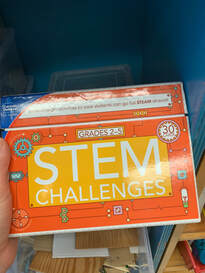
Have some guided activities ready to go
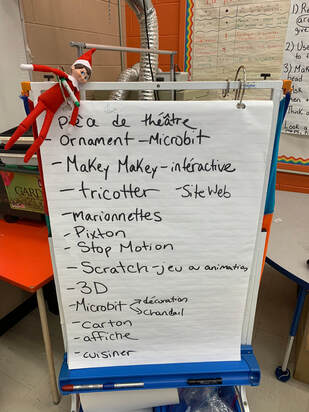
Using Pinterest printed cards or some kind of challenge box is great to give students some structure with pre-designed activities. Plus less prep for you! I love using these activity cards from Scholastic for early finishers and inside play days. Having a choice list too might keep kids focused on skills they already know and ones they may want to learn. This was a list we used for Christmas projects.
Using Pinterest printed cards or some kind of challenge box is great to give students some structure with pre-designed activities. Plus less prep for you! I love using these activity cards from Scholastic for early finishers and inside play days. Having a choice list too might keep kids focused on skills they already know and ones they may want to learn. This was a list we used for Christmas projects.
|
|
Reuse materials whenever possible
I usually ask that if materials are precious (like legos for example), expensive, or can be reused that they be taken apart at the end of their project. I've found that students may hide things around the class, especially half completed sewing or lego projects. Have a discussion at the beginning of the year and establish this re-use mentality for your Maker Space norms as part of the tidying process. If it is a consumable, like cardboard for example, that is easy to replenish, or unique to that student and project (example 3D printed project) I will allow the student to take home.
I usually ask that if materials are precious (like legos for example), expensive, or can be reused that they be taken apart at the end of their project. I've found that students may hide things around the class, especially half completed sewing or lego projects. Have a discussion at the beginning of the year and establish this re-use mentality for your Maker Space norms as part of the tidying process. If it is a consumable, like cardboard for example, that is easy to replenish, or unique to that student and project (example 3D printed project) I will allow the student to take home.
Have a showcase area
Plan for an area that "in progress" projects can be stored, as well as an area to display projects once completed. I have a rule of thumb that "free time" learning projects cannot be parked there for longer than two weeks. That way projects aren't left sitting around never to be completed and the materials and space can be freed up.
Plan for an area that "in progress" projects can be stored, as well as an area to display projects once completed. I have a rule of thumb that "free time" learning projects cannot be parked there for longer than two weeks. That way projects aren't left sitting around never to be completed and the materials and space can be freed up.
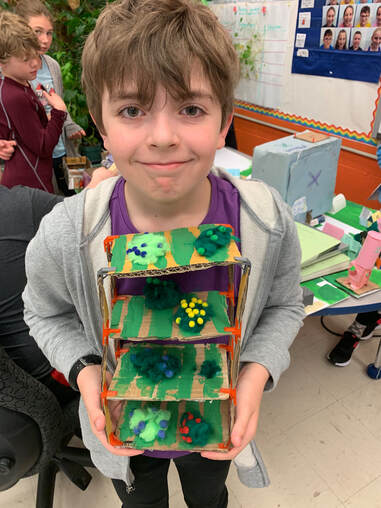
As the year progressed, I began to become more and more of a facilitator. I wasn’t the focus of their learning all day. I could just walk around and help with any troubleshooting or acquiring of materials. We had moved from teacher-centred, to truly student centred. Our best projects of the whole year was our “Community of the Future” and our “Habitats” project. I gave students a check list of some ideas for both, so that they had some structure to work with, but not so much that it was limiting. I didn’t want all the same project. I wanted them to take all the skills from the year, and really APPLY them. The amazing thing is, they did this and far exceeded my hopes. There were completely independent and empowered to make their own things. They worked in groups and pairs that I wouldn’t have thought of. They were constantly engaged, no bickering or behaviour issues. It was pure Maker Magic!
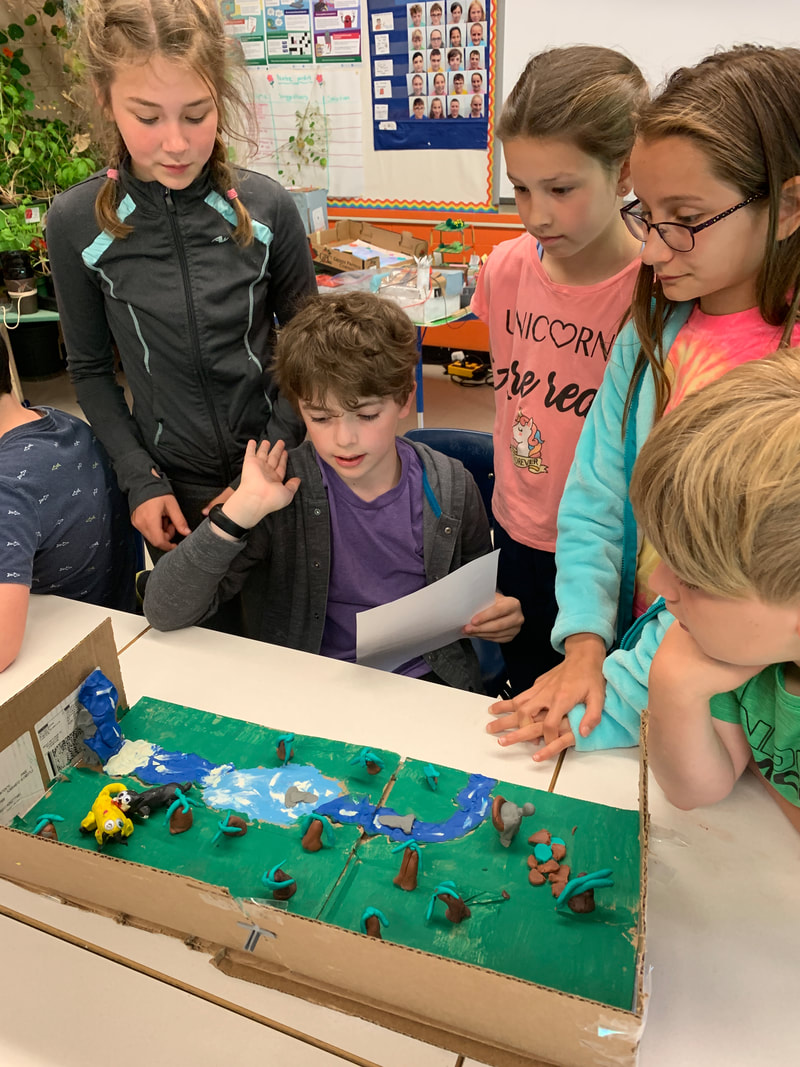
Explaining the habitat elements using a diorama.
|
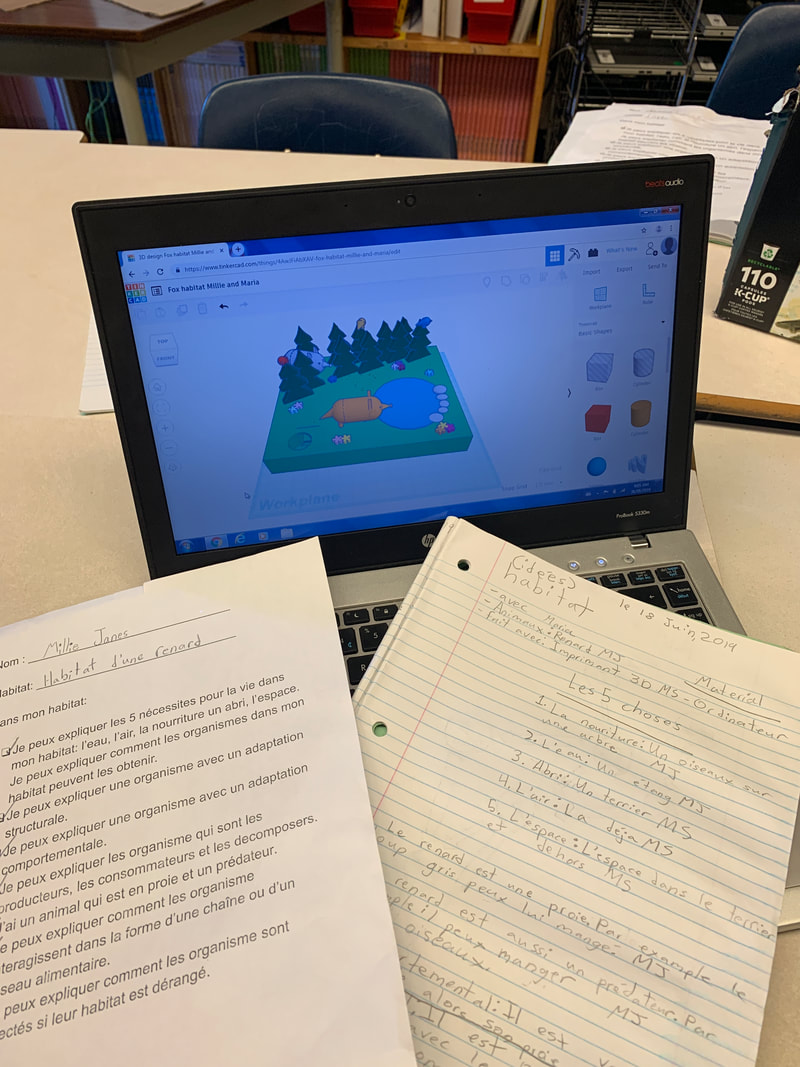
3D rendered habitat using Tinkercad. Using a checklist to complete.
|
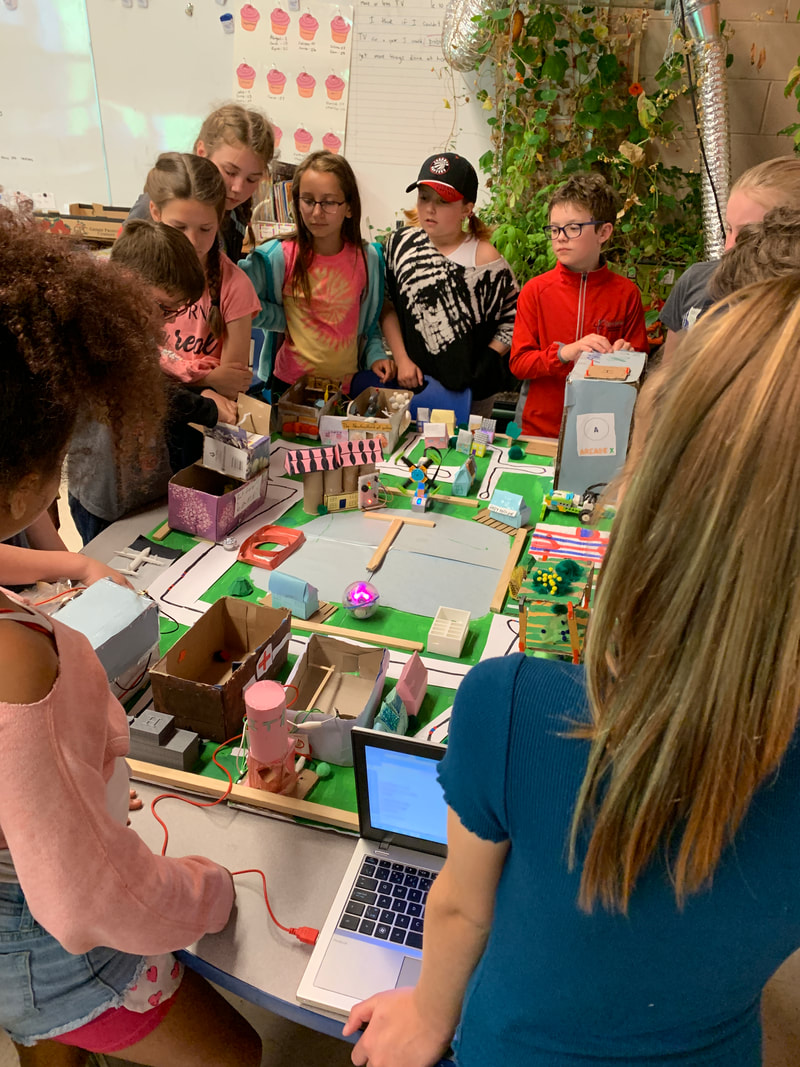
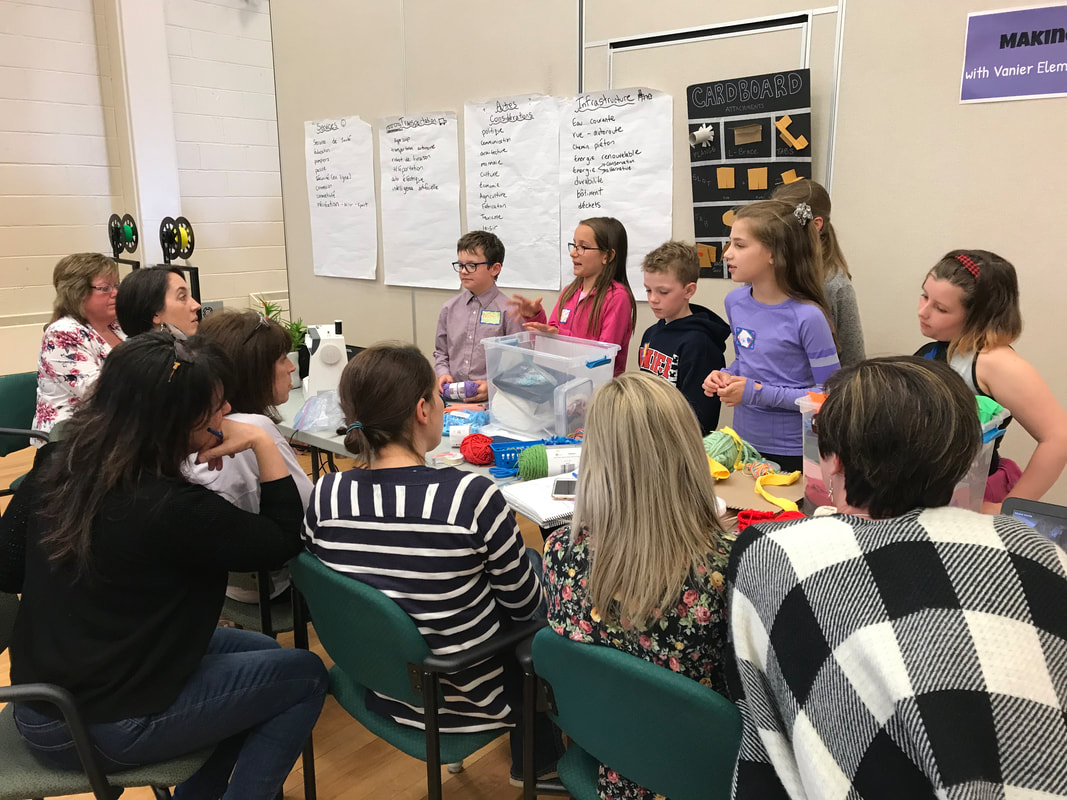
Presenting our "Community of the Future" class project.
|
For more of my thoughts on fostering creativity, have a look at my article about Deep Learning that was featured in NLESD program matters Spring 2019 edition.
For any questions, comments, or more project ideas feel free to reach out to me at
[email protected] or follow me on Twitter @mmehudson
For any questions, comments, or more project ideas feel free to reach out to me at
[email protected] or follow me on Twitter @mmehudson
